Block letter template word
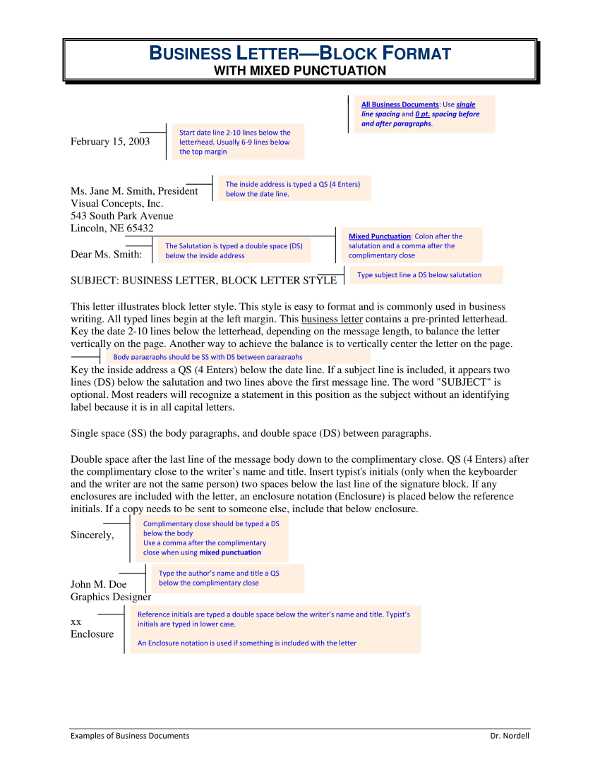
If you need a block letter template in Word, it’s easy to set up a clean, professional format. A block letter style ensures that all text is aligned to the left and no indentation is used. It’s commonly used for formal business correspondence or other professional documents.
Start by opening Microsoft Word and selecting the blank document option. Then, adjust the margins if necessary to ensure your letter fits properly on the page. Use a standard font like Times New Roman or Arial in size 12, which is often recommended for formal letters.
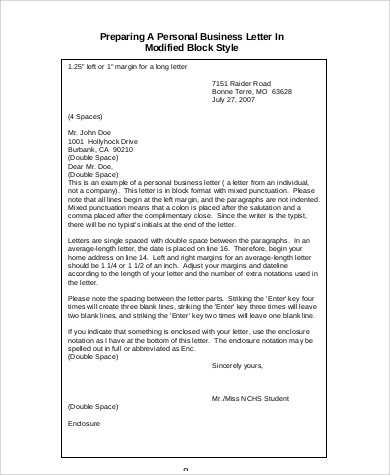
For the layout, make sure that the sender’s address is at the top, followed by the recipient’s address, with a space in between. Afterward, include the date and the salutation. The body of the letter should be aligned left, with single spacing, and leave a space between paragraphs. To make the letter more readable, use clear and concise language with a professional tone.
How to Set Up a Block Letter Template in Word
Open Microsoft Word and create a new document. Set the margins to 1 inch on all sides for a clean layout. Go to the “Layout” tab, select “Margins,” and choose “Normal.” This gives you the standard block letter spacing.
Next, choose a professional font like “Times New Roman” or “Arial,” set the font size to 12, and make sure the text is aligned to the left. Block letters typically avoid indentation, so do not use tabbing for the start of paragraphs. Each paragraph should begin at the left margin.
For the heading, type your name and address at the top of the page. Include the date directly below your address. After the date, add a line break and type the recipient’s name, title, and company (if applicable), followed by their address.
Now, move to the body of the letter. Use clear, concise paragraphs. Each paragraph should be single-spaced with a blank line between paragraphs to enhance readability. At the end of the letter, leave space for a closing statement, such as “Sincerely,” followed by your name and signature. If you are typing this electronically, use a digital signature or leave enough space to sign manually later.
Finally, save the document as a template. In Word, go to “File,” then “Save As,” and choose “Word Template” from the file format options. This allows you to reuse the format for future letters without needing to set up everything again.
Adjusting Margins and Spacing for a Neat Appearance
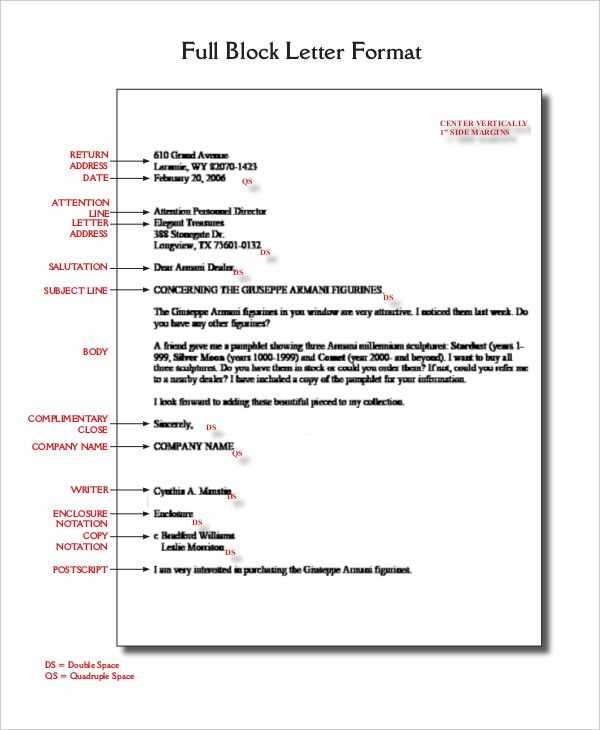
Set appropriate margins to keep the text aligned and ensure a balanced, tidy layout. To adjust margins in Microsoft Word, go to the “Layout” tab and click “Margins.” Select a preset option or customize the values to suit your needs. Standard margin settings of 1 inch on all sides work for most documents.
Controlling Line Spacing
Modify line spacing to improve readability. Select the text and open the “Paragraph” dialog box. Under the “Indents and Spacing” tab, choose a line spacing option such as “1.5 lines” or “Double.” Adjust to “Exactly” for a specific number of points, depending on your preference.
Adjusting Paragraph Spacing
Ensure clear separation between paragraphs. In the “Paragraph” dialog box, set space before or after paragraphs. A 6pt to 12pt space between paragraphs works well for most documents, allowing for easy reading and clear structure.
Consistent margins and spacing maintain a professional look and make your document more accessible to readers. Adjust these settings to match your content’s needs and avoid a cramped appearance.
Choosing the Right Font and Size for Professional Letters
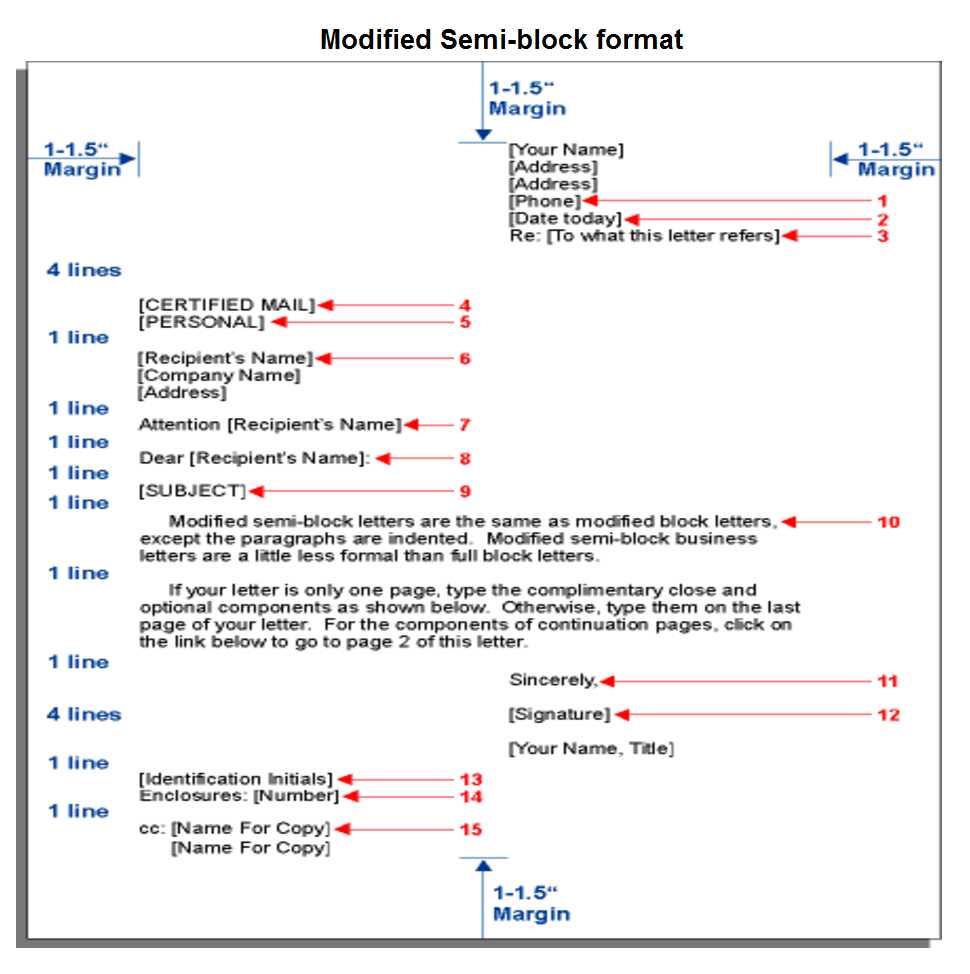
Choose a clean, simple font like Arial, Calibri, or Times New Roman. These are easy to read and widely accepted in business correspondence. Stick to standard, professional fonts to maintain a formal tone.
The font size should be between 10 and 12 points for most professional letters. This range ensures that your letter is legible and not too crowded. For headers or section titles, you can use a slightly larger font size, but avoid going beyond 14 points.
Consistency is key. Make sure your font and size are uniform throughout the document to create a polished, cohesive look. If you’re using a serif font like Times New Roman, keep the size at 12 points for readability. For sans-serif fonts like Arial or Calibri, 11 or 12 points will usually work best.
| Font | Recommended Size |
|---|---|
| Arial | 11-12 pt |
| Calibri | 11-12 pt |
| Times New Roman | 12 pt |
Always preview your letter before sending. Make sure the text looks balanced and professional on screen and when printed. A clear font and size create a lasting impression of professionalism and attention to detail.
Adding Your Contact Information in the Header
Place your contact details in the header for easy visibility. Keep it concise with your name, phone number, and email address. Use a clean and simple layout to avoid clutter. Align the information to the left or right, ensuring it doesn’t overwhelm the rest of the content.
To highlight your email or phone number, use bold text or italics. This ensures your contact information stands out without looking too busy. A smaller font size can help keep the design neat, but make sure it remains legible.
If you’re using a logo or company name, position it at the top left of the header and place your contact information to the right, maintaining balance. This layout is common for business correspondence and ensures both elements are easily accessible.
How to Include Date and Recipient Information Correctly
Place the date at the top of the letter, aligned to the right side of the page. Use a clear format, such as “Month Day, Year” (e.g., January 30, 2025). This is the standard for most formal documents and provides clarity on when the letter was written.
The recipient’s information should follow below the date, aligned to the left. Start with the recipient’s name, followed by their title (if applicable), company name, and address. Each line should be separated by a space. Double-check the recipient’s details for accuracy to avoid errors.
Formatting the Date
Ensure that the date stands out without any distractions. Avoid abbreviations for the month, as full names (e.g., “January” instead of “Jan”) are clearer in professional communication. Stick to a consistent format throughout your document.
Addressing the Recipient
Use the recipient’s formal title, such as Mr., Ms., Dr., or Professor, and their last name unless you are on familiar terms. If the letter is addressed to a company or organization, omit personal titles and use the company’s full name instead.
Saving and Reusing Your Block Letter Template
To save time, store your block letter template in a location that’s easy to access and organize. Use these steps to ensure you can reuse it efficiently:
- Save the document on your computer or cloud storage in a folder dedicated to templates.
- Use clear, descriptive file names (e.g., “Block_Letter_Template_2025”) for easy identification.
- Choose formats like .docx or .dotx for Word to keep formatting intact, or save as .pdf if sharing with others.
For future use, open the saved template whenever you need to write a new letter, ensuring consistency. To keep it relevant, periodically update the content, such as adding new address information or adjusting formatting preferences.
Editing and Customizing Your Template
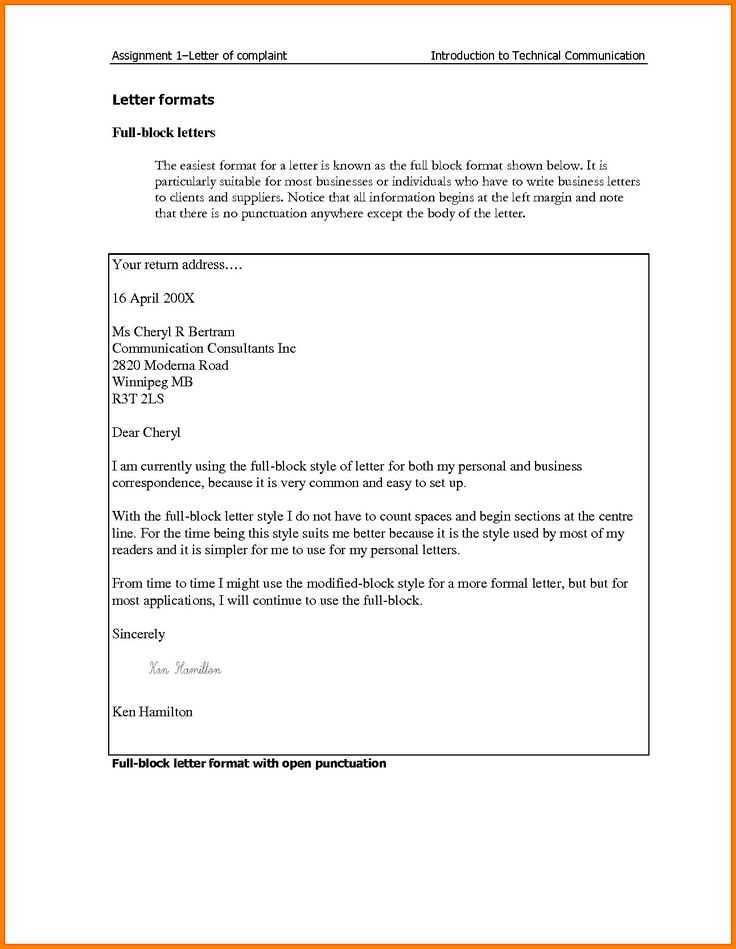
- Open the saved template file and remove any outdated details.
- Adjust the template’s layout or content if necessary–this might include the date, recipient’s name, or specific subject lines.
- Save the document again as a new file if significant changes are made to avoid overwriting the original template.
Sharing and Distribution
- If you need to share the template, email it as an attachment or upload it to a shared cloud service for easy access by others.
- To maintain consistency, provide clear instructions for others on how to use and update the template.