Mail merge from excel to word letter template
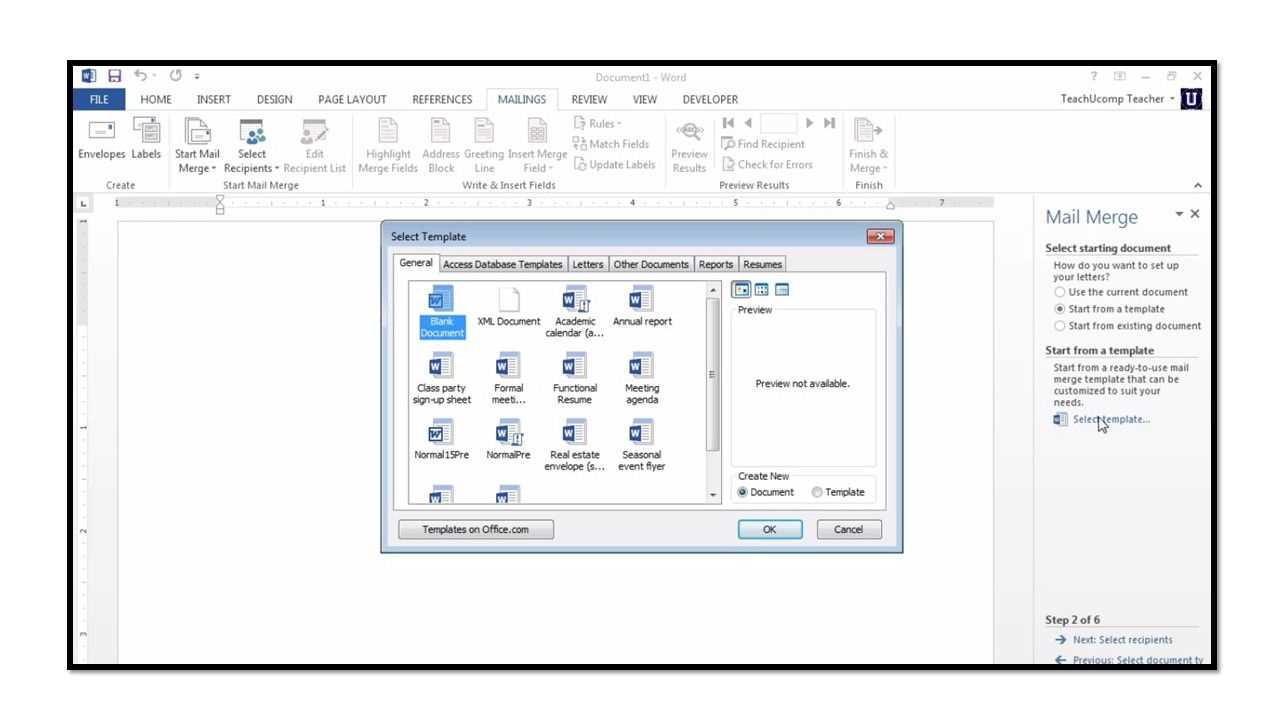
To streamline your document creation process, use mail merge to transfer data from an Excel spreadsheet into a Word letter template. This process helps automate personalized letters for mass communication, saving both time and effort. Start by ensuring your Excel file contains the necessary columns, such as names, addresses, and other details that should appear in the letter.
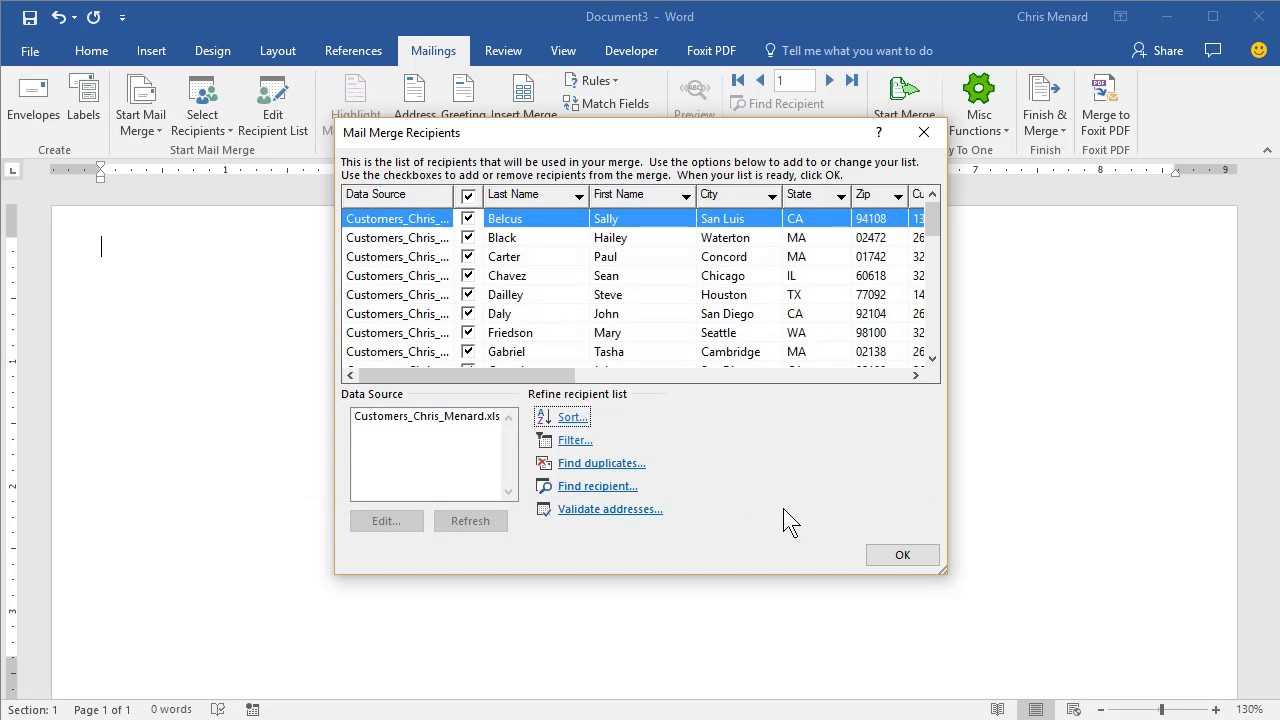
Next, open your Word document with the letter template. Go to the Mailings tab and select Start Mail Merge. Choose Letters as the document type, then click Select Recipients and choose your Excel file. The spreadsheet’s data will now be available for use in the template.
Insert merge fields by selecting Insert Merge Field from the Mailings tab. Choose the fields from your Excel file that should appear in the letter, like first names or addresses. These fields will be replaced with actual data once the merge is complete.
After completing the template setup, click Finish & Merge to create your personalized letters. You can either print the documents directly or save them as individual files for future use. This method simplifies sending personalized letters to a large group, ensuring accuracy and consistency.
Here are the corrected lines:
Ensure that the Excel data is properly formatted before performing the mail merge. Check that all columns are correctly labeled with no extra spaces or hidden characters. For example, the column names in Excel should match the placeholders in your Word template exactly.
If your Word document does not display data correctly, confirm that the merge field names are spelled correctly. Also, verify that there are no empty rows in the Excel sheet that could cause issues during the merge process.
Fixing Data Formatting Issues:
In case of formatting errors, such as dates or currency, use Excel’s formatting options to set the correct type for each column. For instance, if a date is displayed incorrectly in Word, go back to Excel and format the column as a date.
Linking Fields Properly:
Check that each merge field in Word is linked to the correct column in Excel. Right-click the merge field, select “Edit Field,” and ensure that the name of the Excel column matches exactly with the merge field in Word. This step prevents any mismatches during the merge.
- Mail Merge from Excel to Word Template
To perform a mail merge from Excel to a Word template, follow these steps:
- Prepare the Excel file: Ensure your Excel sheet is well-organized. Each column should have a header (like Name, Address, etc.), and each row should contain the data for one letter or document.
- Set up the Word document: Open Word and create a new document. Design your letter template with placeholders for the data you want to merge (e.g., First Name, Address).
- Link Excel to Word: In Word, go to the “Mailings” tab and select “Start Mail Merge.” Choose “Letters” for your document type. Then click “Select Recipients” and choose “Use an Existing List.” Locate your Excel file and select it.
- Insert merge fields: Place your cursor where you want the personalized data to appear. Click “Insert Merge Field” and select the corresponding column name from Excel (e.g., First Name). Repeat for all other fields.
- Preview the document: Click “Preview Results” to ensure the data appears correctly in your document. Adjust the formatting if needed.
- Complete the merge: Once satisfied with the preview, click “Finish & Merge” to generate the final documents. You can either print them directly or create individual files.
Ensure that your Excel file is organized before you begin the mail merge process. Each column should represent a different type of information, such as first name, last name, address, or any other relevant data for the merge. Avoid mixing different types of data in one column to prevent errors during the merge process.
Structure Your Data Correctly
Each row in your Excel sheet should represent a unique record, such as an individual recipient or a letter entry. The first row should contain headers that clearly describe the data in each column. Use straightforward names for the headers like “First Name,” “Last Name,” “Street Address,” etc. This ensures that you can easily match the data to placeholders in your Word document later.
Remove Unnecessary Formatting
Check your Excel file for any unnecessary formatting, such as bold text, colored cells, or merged cells, which could interfere with the mail merge process. Stick to simple, clean data for best results.
| First Name | Last Name | Street Address | City | Zip Code |
|---|---|---|---|---|
| John | Doe | 123 Main St | Springfield | 12345 |
| Jane | Smith | 456 Oak Rd | Lakewood | 67890 |
By following these simple steps, your Excel file will be ready for a smooth mail merge with your Word template. Clean, well-structured data ensures that the merge process runs smoothly and produces accurate results.
To create a mail merge template in Word, begin by opening a new or existing document where you want to insert the personalized information. Identify where the placeholders for the data will go, such as recipient name, address, or other details. You can create text blocks or format the layout as needed, but be sure to leave space for merging fields.
Once the structure is in place, go to the ‘Mailings’ tab in Word. Click ‘Start Mail Merge’ and select the type of document you want, such as letters or labels. From there, choose ‘Select Recipients’ and either use an existing list or import data from an Excel file. After the data source is linked, insert fields like name, address, etc., by choosing ‘Insert Merge Field’ from the Mailings tab. This inserts placeholders that will later be replaced with actual data during the merge.
Review the template to ensure all fields are correctly positioned. You can use formatting options to style the placeholders or adjust the alignment for a polished look. To preview how the final letter will look, click ‘Preview Results’ under the Mailings tab. This step ensures everything is aligned properly before completing the merge.
| Action | Description |
|---|---|
| Open a Word document | Start with a new or existing document for your template |
| Choose ‘Mail Merge’ option | Select the document type and link the data source |
| Insert merge fields | Placeholders for personalized data (e.g., name, address) |
| Preview the document | Check if the fields are correctly placed and formatted |
After verifying the content, you can proceed with completing the merge. By clicking ‘Finish & Merge’, you’ll have the option to print, create a new document, or send emails based on the template and the linked data.
To link Excel data to a Word document for a mail merge, begin by ensuring your Excel file is organized with clear headers in the first row, corresponding to the fields in the Word template (e.g., First Name, Last Name, Address). This structure will simplify the merge process.
Step 1: Prepare Your Excel File
Check that all columns in the Excel file contain consistent data types (e.g., text, numbers, dates) and remove any unnecessary blank rows or columns. Save your file in a location that’s easily accessible, as you’ll need to link it in Word.
Step 2: Link Excel Data in Word
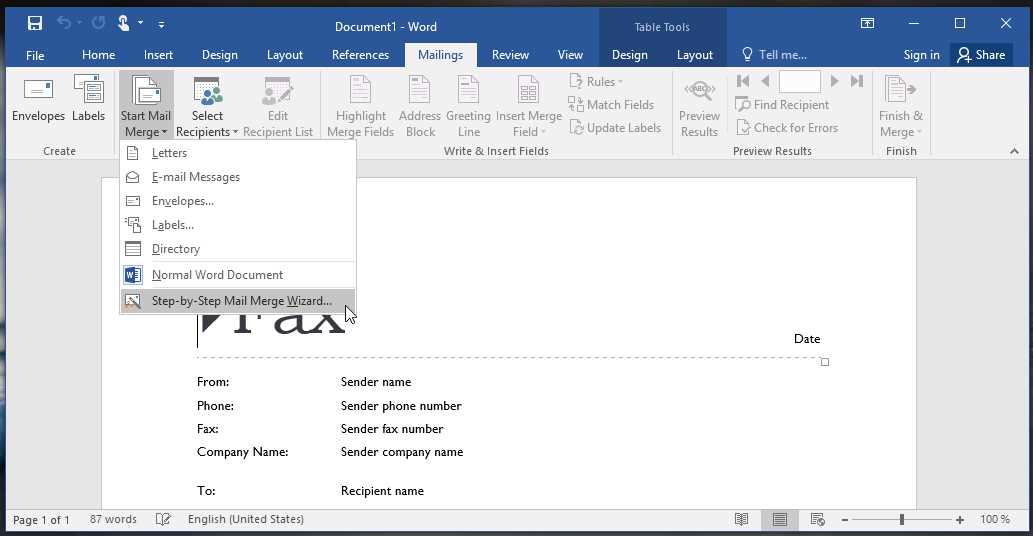
Open the Word template and navigate to the “Mailings” tab. Click “Select Recipients” and choose “Use an Existing List.” Locate your Excel file, select it, and confirm the sheet to link to. Word will then display a list of available fields, matching the column headers in Excel to placeholders in the document.
By linking Excel data, you ensure that Word pulls the most recent and accurate information when generating merged documents, making the process more streamlined and precise.
To insert merge fields into your Word template, position the cursor where you want the field to appear. Next, navigate to the “Mailings” tab in Word’s ribbon, and click on “Insert Merge Field.” A dropdown will display a list of available fields from your Excel data. Choose the field you want to insert by clicking it. The merge field will appear in the template as a placeholder, formatted with double chevrons (e.g., «FirstName»).
Using the “Insert Merge Field” Option
Once the field is inserted, you can adjust its placement as needed. It’s helpful to format the merge field in a way that aligns with your letter’s design–whether it’s in a header, body, or footer section. The field will automatically populate with the corresponding data from the Excel file when you run the mail merge process.
Previewing the Merge Fields
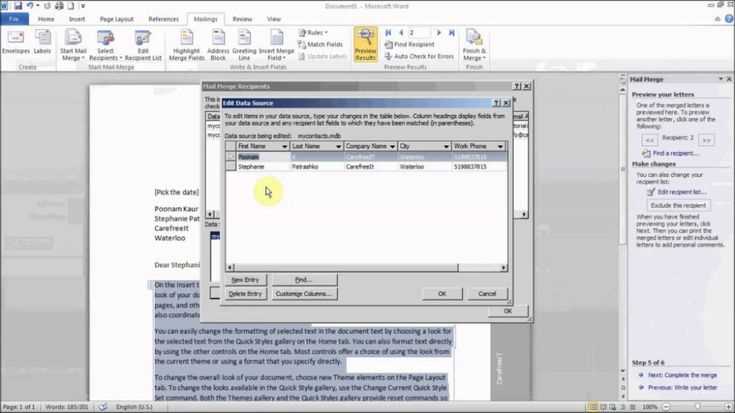
Before finalizing your document, preview the merged content by selecting the “Preview Results” button in the Mailings tab. This will show you how each individual letter will appear with the specific data filled in from the Excel file. Ensure that each merge field aligns with the correct data and looks consistent across all merged documents.
Before finalizing a mail merge, preview your letters to check the formatting and data accuracy. Use the “Preview Results” button in Word to see how the merged data looks in your document. This allows you to spot any issues with spacing, text alignment, or missing fields.
Adjusting Layout and Formatting
If the merged fields do not align properly, adjust the layout. Modify the font size, change margins, or reposition text boxes to better fit the content. Ensure that each section flows smoothly without awkward breaks.
Customizing Individual Letters
Customizing letters for specific recipients is simple. After previewing, select a specific record and manually adjust the content if needed. This might be useful for including additional notes or making personalized changes that apply to only one recipient.
- Click on the “Edit Individual Letters” option if you need to create a customized batch of letters.
- Use conditional fields to adjust the content based on certain conditions, such as different messages for customers in different regions.
Ensure you check everything before proceeding with the final merge to avoid mistakes in the output document.
After completing the mail merge, review each letter for accuracy. Check for any missing data or formatting errors. You can do this by scrolling through the merged document or using the “Preview Results” option in Word. Ensure that all personalized information, such as names or addresses, has been correctly inserted into the template.
If necessary, adjust the layout or formatting of the document. Ensure that all text fits within the designated areas, and modify font sizes or margins if required. Pay attention to alignment and consistency across all pages.
Preview and Proofread
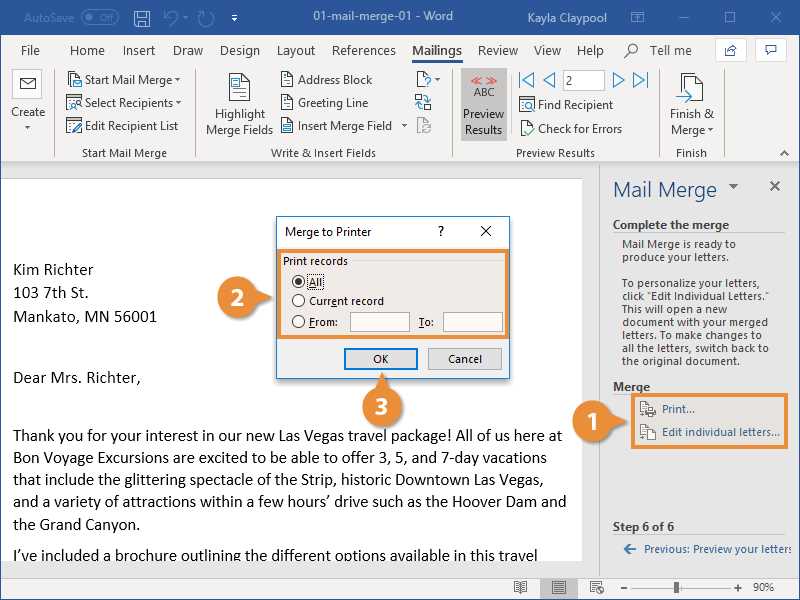
Before printing, it is crucial to preview the document once more. Use the “Print Preview” function in Word to see how each page will appear on paper. This step helps identify any issues with page breaks or alignment that might not be visible in the standard view.
Print Settings
Set up your printer properly. Select the correct printer, paper size, and orientation. If you’re printing on both sides, make sure to adjust the settings accordingly. You can choose to print all letters at once or select specific ones to print. If you’re printing a large batch, consider printing a few test pages first to confirm everything looks right.
How to Use the </ol> Tag in Word Mail Merge Templates
To close an ordered list in a Word mail merge template, use the </ol> tag. This tag ensures that the list is properly closed after the items are listed, which maintains the correct structure in the document.
Steps for Proper Usage
- After entering your list items within the
<ol>tag, close the list by typing</ol>at the end. - Make sure the list items are properly formatted using
<li>tags, which define each item in the list. - Preview the mail merge to ensure that the ordered list displays correctly when merged with the Excel data.
This simple step guarantees the mail merge template displays a neat, organized list, especially when working with a large number of data points in your Excel file.