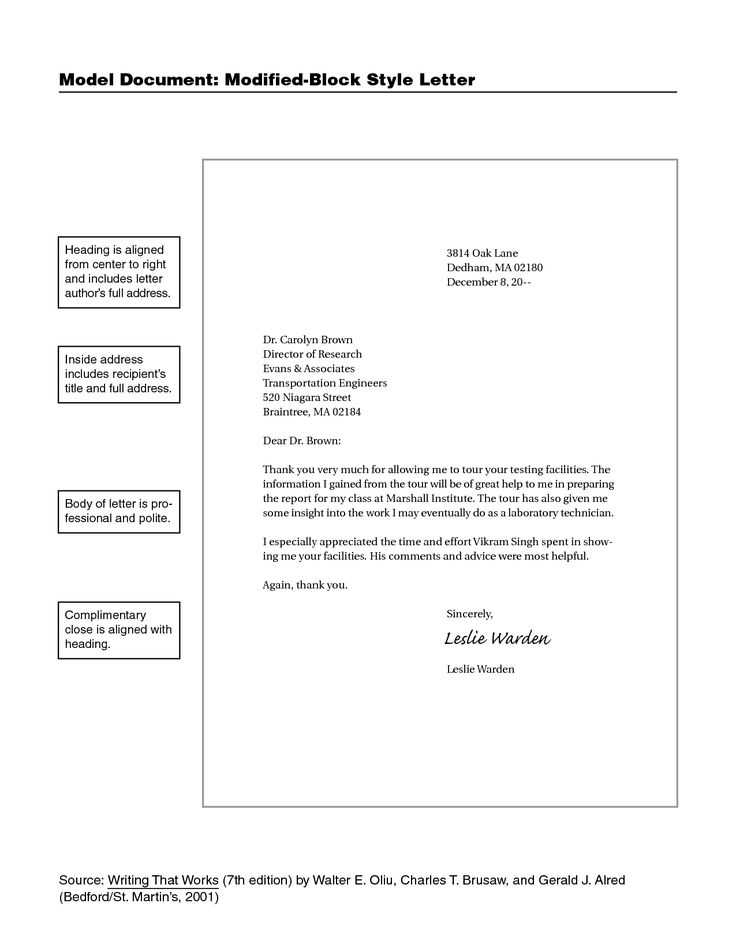
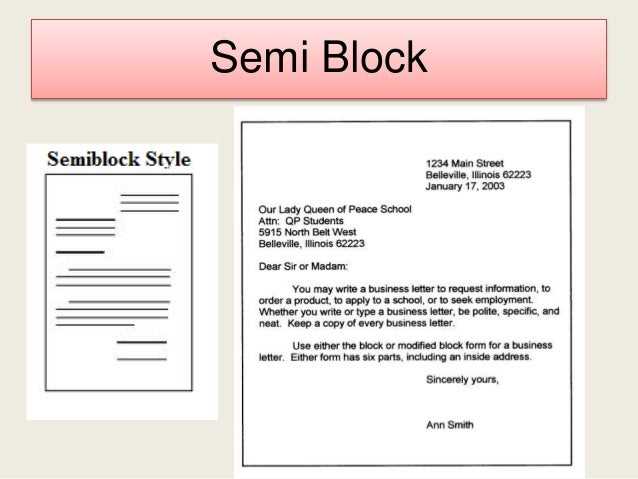
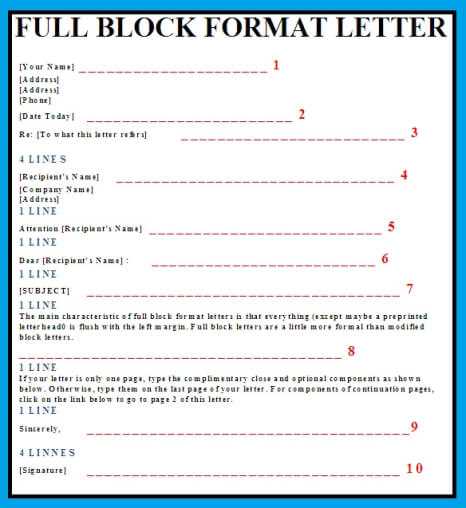
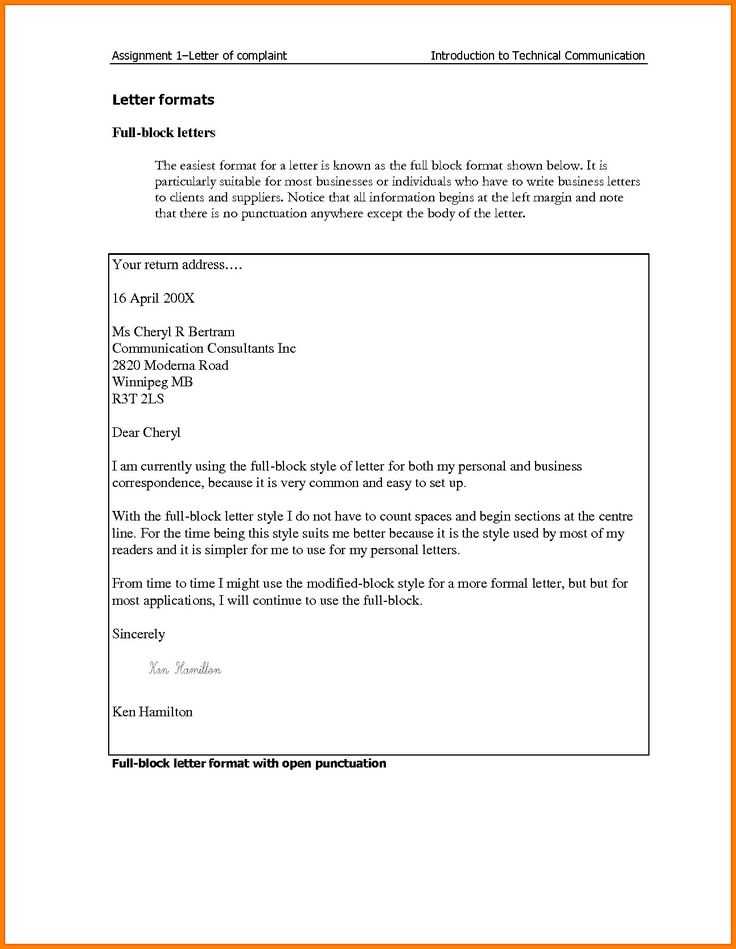
Block style letter format template

For clear and professional communication, adopt the block style letter format. This method ensures your message is structured and easy to follow. Each section of your letter, from the heading to the closing, is aligned to the left, making it visually appealing and straightforward.
Begin by placing your sender’s address at the top, followed by the date. Make sure there is a space between each part of the address. The recipient’s information follows, including the name, title, and company, with a line break between each detail. Next, craft your salutation–keep it formal and to the point, such as “Dear [Recipient’s Name],”.
As you move into the body, maintain a clear and concise structure. Start each paragraph without indentation, leaving a space between them to enhance readability. Finish with a polite closing statement, such as “Sincerely” or “Best regards”, followed by your name and signature, if needed. This format ensures your message remains direct and professional.
Block Style Letter Format Template
Use a clean and straightforward approach when writing a letter in block style. Begin with your address at the top, aligned to the left. Skip the recipient’s address if you’re using personal letter format. Then, move directly to the date, formatted as “Month Day, Year” (e.g., January 29, 2025).
Salutation: Address the recipient with a formal greeting, followed by a colon. For example: “Dear Mr. Smith:”.
Body: Write the content in single-spaced paragraphs. Leave a space between each paragraph. Maintain a professional tone throughout. Avoid using any unnecessary filler words. State your points directly and clearly.
Closing: Conclude with a formal closing, such as “Sincerely,” or “Best regards,” followed by a comma. Leave a few lines for your signature, and then type your full name underneath.
Ensure that every part of the letter is aligned to the left margin. Block style emphasizes simplicity, making it ideal for professional correspondence.
Choosing the Right Font for Your Letter
Opt for clean, professional fonts like Arial, Calibri, or Times New Roman. These fonts are easy to read and provide a polished look. For a formal letter, stick with serif fonts such as Times New Roman. If you’re aiming for a more modern feel, sans-serif options like Arial or Calibri are appropriate. Keep the font size between 10 and 12 points for readability. Avoid decorative or script fonts, as they can appear unprofessional and difficult to read in a formal context.
Choose a font that aligns with the tone of your letter. For business or official correspondence, select a straightforward, neutral font. If you’re writing a personal letter, you can be slightly more flexible but should still prioritize legibility and clarity.
How to Format the Heading in Block Style

Align the heading to the left margin, ensuring there are no indents. Use a larger font size compared to the body text to create distinction. Capitalize each significant word in the heading, excluding short conjunctions or prepositions. Place the heading directly above the first paragraph, leaving a single line space for clarity. Avoid any punctuation marks at the end of the heading.
Key Guidelines
The following table summarizes the primary guidelines for formatting headings in block style:
| Aspect | Recommended Action |
|---|---|
| Text Alignment | Left-aligned |
| Font Size | Larger than body text |
| Capitalization | Capitalize significant words |
| Punctuation | Do not use punctuation marks |
| Spacing | One line space above body text |
Examples of Block Style Headings
Here are some examples of how to format headings in block style:
| Correct Heading | Incorrect Heading |
|---|---|
| How to Write a Block Style Letter | How To Write A Block Style Letter? |
| Formatting Tips for Block Style | Formatting tips for block style! |
Placement of the Recipient’s Address
The recipient’s address should be positioned at the left margin, directly below the sender’s address if included. Keep it aligned vertically without indentation. Follow these guidelines:
- Line 1: Full name of the recipient
- Line 2: Street address or P.O. Box
- Line 3: City, state, and ZIP code
Ensure that each element is on a separate line, with no extra spaces. Avoid abbreviations unless necessary. For international addresses, use the country’s full name on the last line.
Formatting Tips

- Use a clear font and size for easy reading.
- Keep the address uniform in style, with no excessive punctuation or capitalization.
- Double-check the address for accuracy before mailing.
Structuring the Body Paragraphs Clearly
Each body paragraph should focus on a single point. Begin with a clear topic sentence that introduces the main idea of the paragraph. Follow this with supporting evidence or details that directly relate to the topic. Avoid including unrelated information, as it can confuse the reader.
Use transitions between sentences to guide the reader smoothly from one idea to the next. Transition words like “additionally,” “for example,” or “in particular” help create logical connections. Keep these transitions brief, ensuring they serve the flow without interrupting the point being made.
Break down complex ideas into manageable chunks. Use examples or analogies to clarify difficult concepts. This keeps the reader engaged and helps to illustrate the point you’re making.
Stay concise and precise. Remove unnecessary words or filler that do not add value to the argument. Each sentence should contribute directly to supporting the main point of the paragraph. When finished, the paragraph should feel complete, with no loose ends or ambiguous statements.
Closing Your Letter with Professionalism
Sign off your letter confidently to leave a positive and lasting impression. Use a respectful closing that suits the tone of your message.
Choose the Right Closing Phrase
Pick a closing phrase that aligns with the nature of your communication. Common formal options include:
- Best regards
- Sincerely
- Yours truly
- Kind regards
Each of these conveys professionalism while allowing flexibility for the formality of the situation. If the letter is more casual, a simple “Best wishes” can suffice, but avoid overly familiar closings in professional contexts.
Sign Your Name Clearly

After your chosen phrase, include a clear signature. If you are sending a physical letter, sign your name in ink. In an email, type your name and, if appropriate, include your title and contact information below your name for easy reference.
A strong closing reinforces the professional tone of your letter and leaves no ambiguity in your intentions. Keep it simple and direct to maintain clarity.
Final Touches: Proofreading and Adjustments
After finalizing your letter, carefully proofread for any spelling, punctuation, or grammatical errors. Focus on the structure, ensuring consistency in font, margins, and spacing. Double-check names, dates, and contact information for accuracy. Pay attention to the tone–make sure it aligns with the intended recipient, adjusting formality or friendliness where needed.
Next, confirm that the letter flows logically from one paragraph to the next. Eliminate unnecessary phrases or awkward wording that may disrupt readability. Read through the letter aloud to catch any inconsistencies in rhythm or phrasing.
Finally, verify that the message is clear and concise, without excess details that could distract from the main purpose. Fine-tune the closing to leave a lasting impression, ensuring it matches the letter’s overall tone.